Australia Outlook Login Page and Owa Login Page Updated FREE
Australia Outlook Login Page and Owa Login Page
Terminal updated 25th June 2021
Objective
With OVHcloud Hosted Exchange you tin can transport and receive your emails using a device and client of your choice. To access an account from anywhere via web browser, OVHcloud provides an online e-mail customer called Outlook Spider web Application (OWA). Our webmail login folio is the single signal of admission to the respective OWA for all agile electronic mail accounts on MX Programme, Email Pro and Hosted Exchange.
This guide explains how to apply your email accost with OWA and exemplifies the almost of import features of this interface.
Requirements
- an OVHcloud email solution already ready (MX Plan, available as office of our Web Hosting plans, included in a gratis Start10M hosting or ordered separately as a standalone solution; Hosted Exchange or Email Pro)
- login credentials for the email accost you want to configure
Instructions
This guide will requite you a better understanding of the usual electronic mail account tasks available in the OWA webmail. However, since this interface was not originally created past OVHcloud, we are unable to provide specific instructions about whatsoever settings not mentioned in this guide. Regarding Commutation functionalities, we take prepared some additional guides which you can detect in the Go further section below.
Subsequently the first ii steps, the instructions don't have to be considered in a particular order. You tin utilize the navigation bar on the left-hand side of this guide to spring to the paragraphs that are useful to you.
one. Accessing OWA webmail
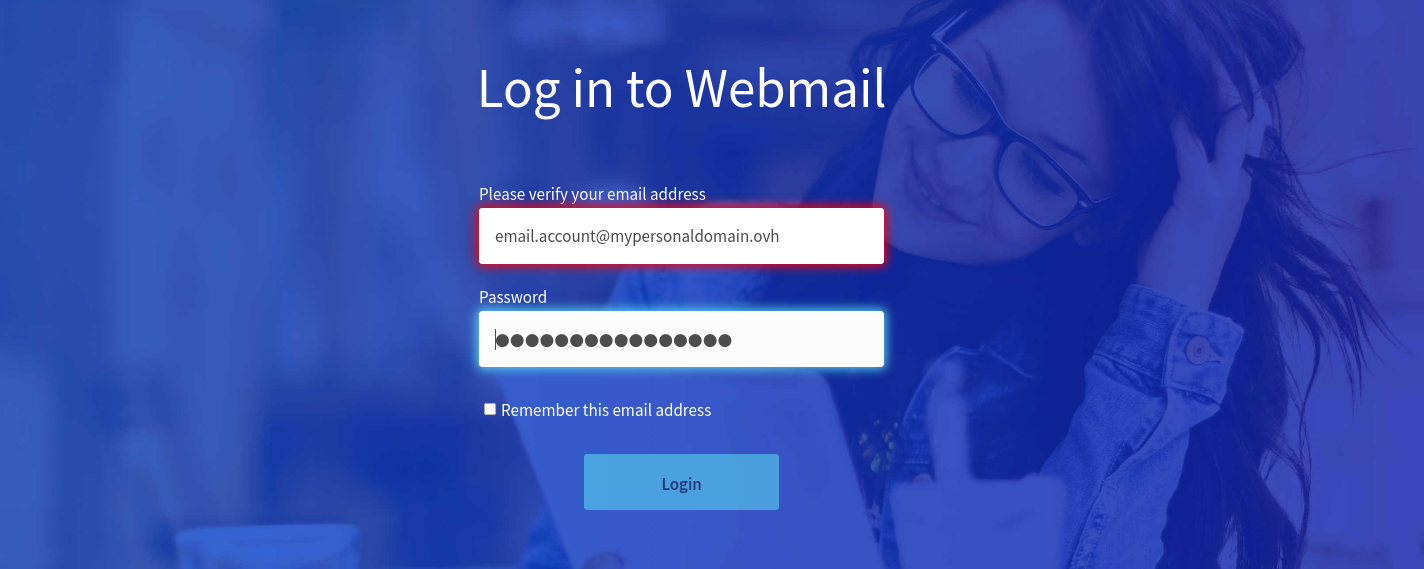
To log in to OWA webmail with your email address, go to the general webmail login folio. Enter your full email address and password, then click the Login button.
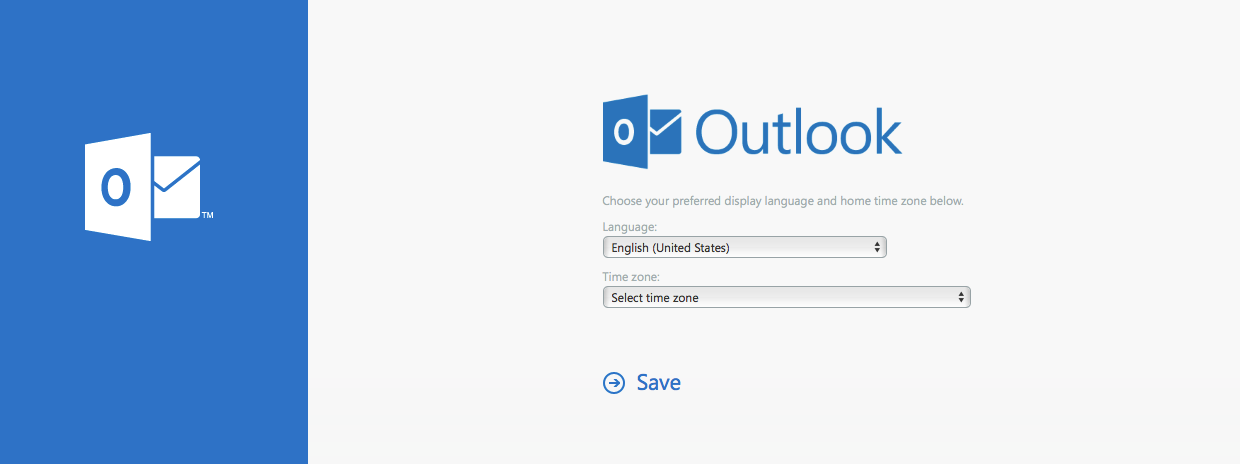
If this is your start time logging in to OWA webmail with this electronic mail address, you lot will exist prompted to set the interface language and time zone. Click Salve to continue.
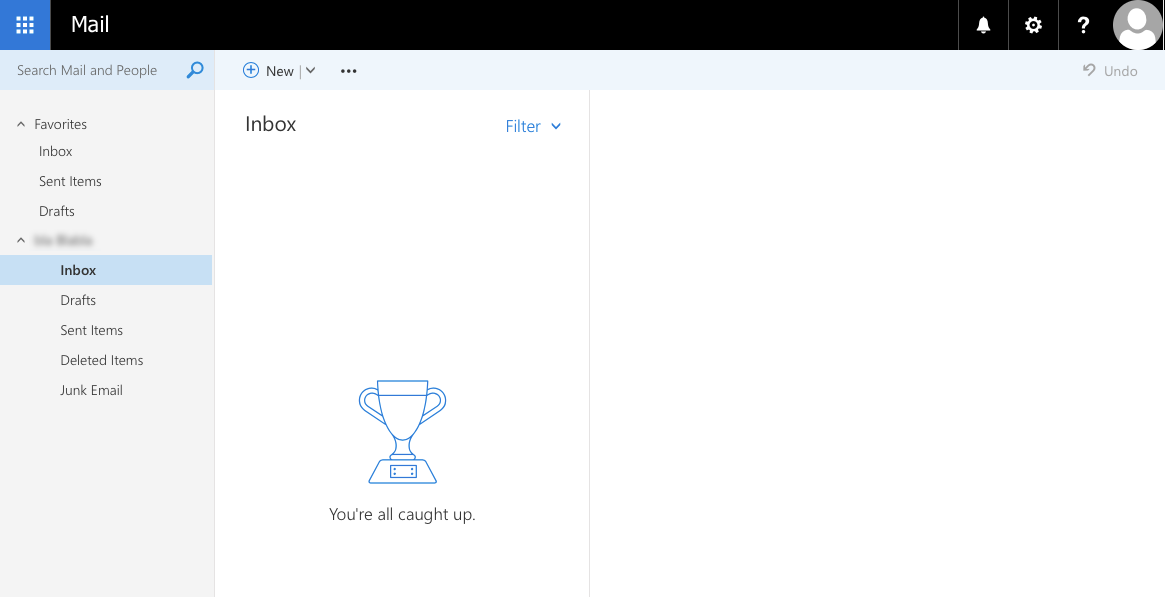
From at present on, your inbox view will appear by default afterward login.
2. Understanding the OWA display
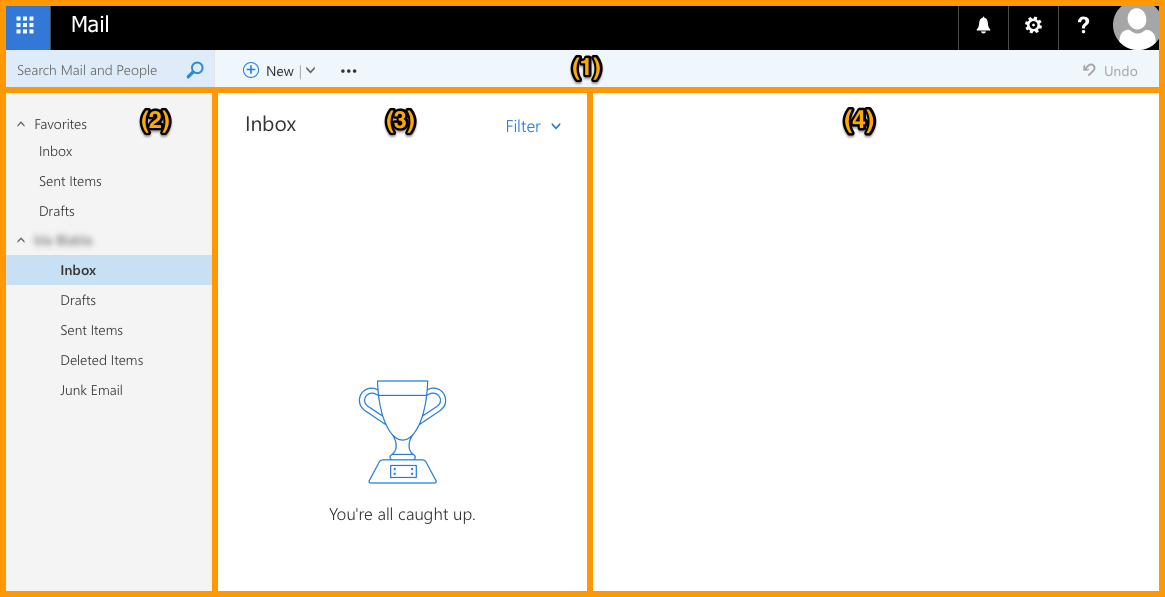
In that location are several sections to the OWA interface. Please refer to the table and the prototype below to familiarise yourself with it.
| Parts | Description |
|---|---|
| Top section (1) | Contains two tab bars: the first one allows access to general settings (such equally the options department), and the second 1 tin can be used to perform specific actions with your accost (such as sending or replying to emails). |
| Left-hand side (2) | Displays the list of folders for your email address. These appear as a tree-view that you tin can aggrandize or hide. |
| Fundamental segment (three) | Displays the list of letters (read and unread) from the folder selected in the left-paw carte. This department tin besides display search results. |
| Right-paw side (iv) | Displays the reading pane when an electronic mail has been selected. |
Note that y'all can change the size of the vertical sections past clicking and dragging their border lines.
Viewing emails
To view your emails, select a binder on the left-hand side. Incoming emails that are not treated past inbox rules volition go far in the "Inbox" folder. To run into if y'all have received any new emails, check if a number appears side by side to the respective folder.
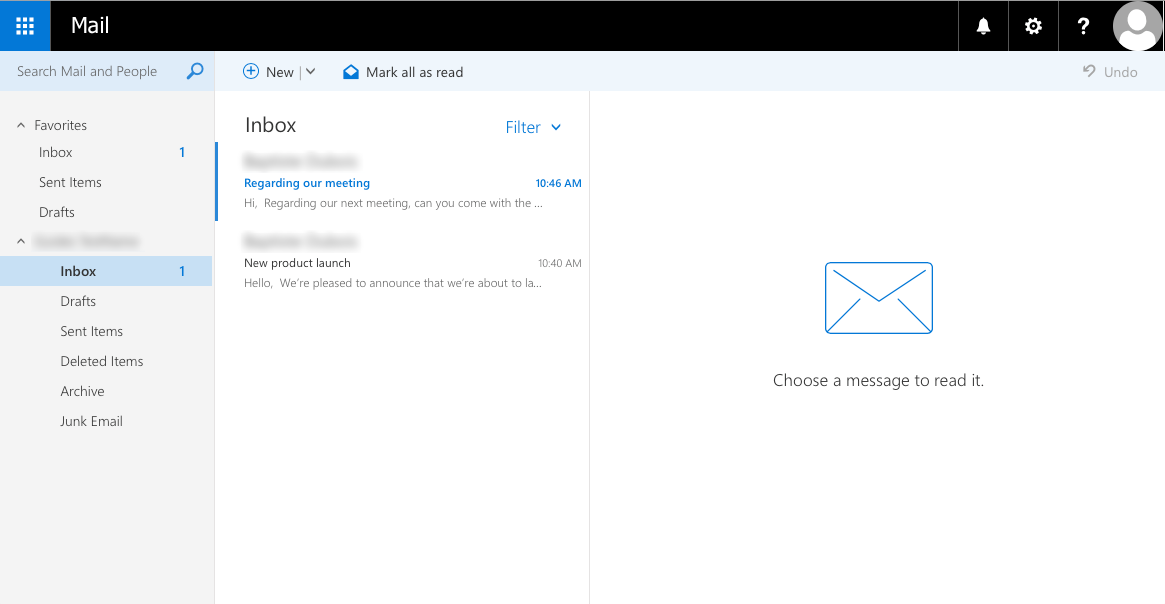
To read an electronic mail, select its binder if necessary. Now click on the email to show its content in the reading section. Unread messages appear in a dissimilar colour to gear up them apart from letters that have been read.
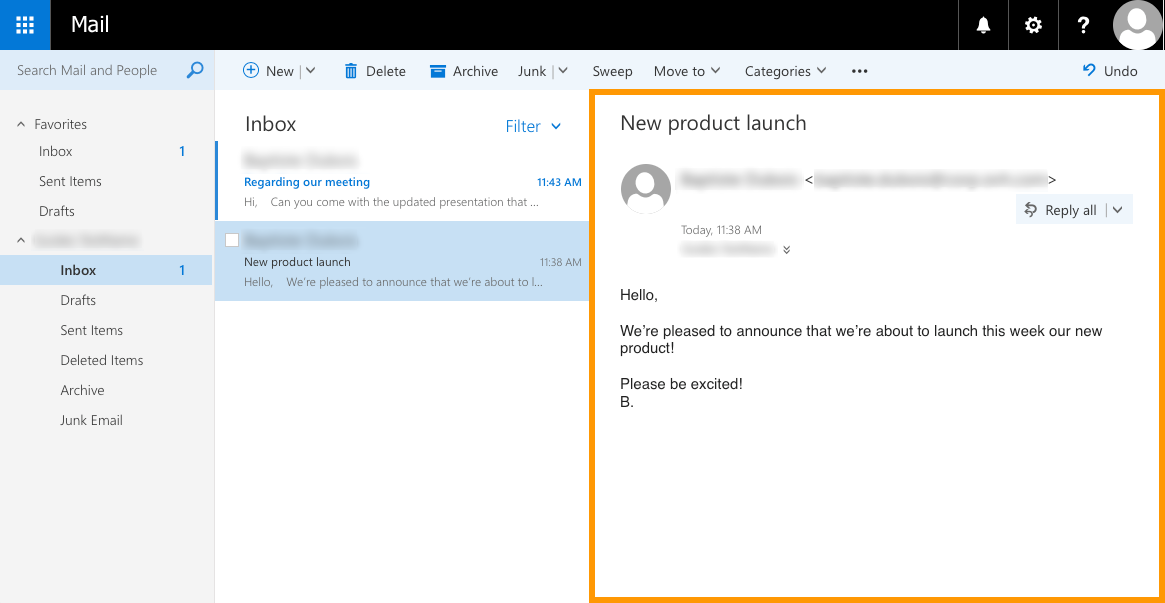
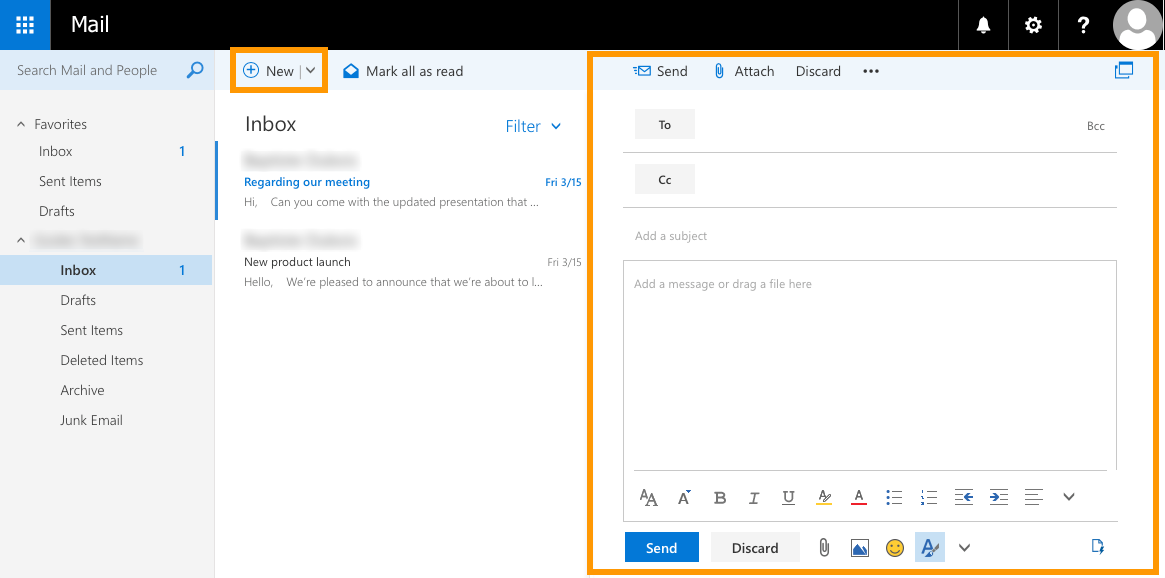
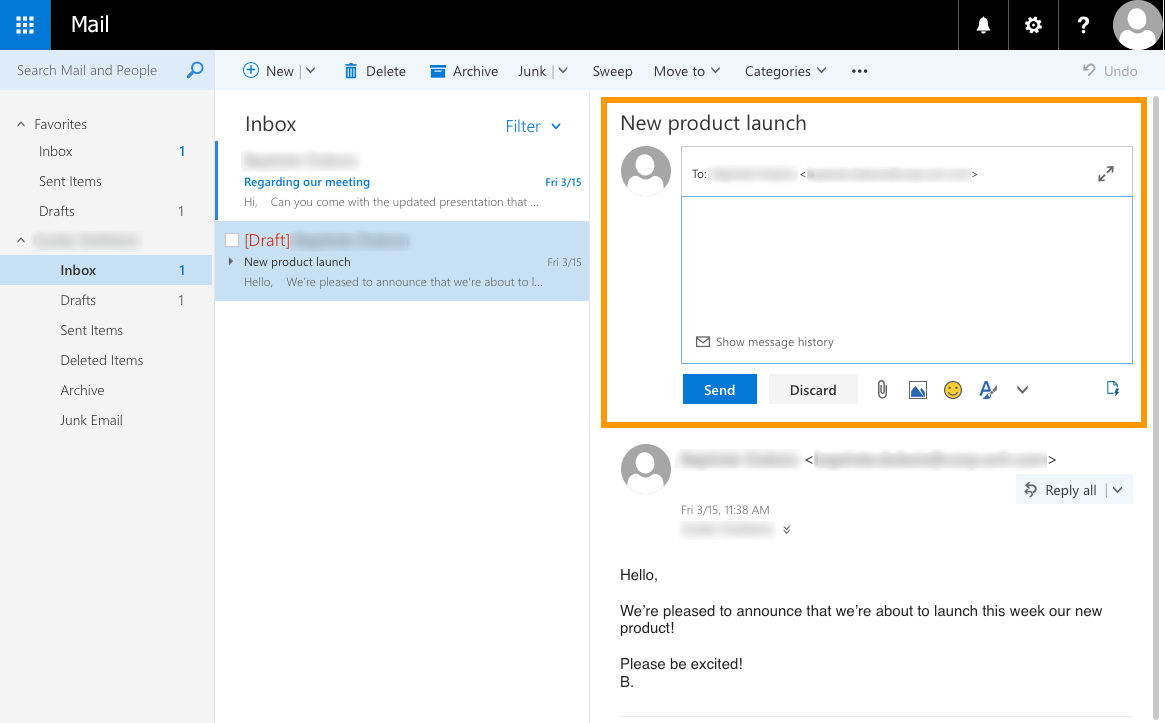
Sending and replying
To transport a new e-mail, click the New button at the top of the webmail interface. The editing pane will appear on the right-manus side. Fill in the fields for your email (recipients, subject, bulletin body, attachments). Once you lot are prepare to send information technology, click the Send push button.
To reply to an email, click on it first to brandish it. So click on the Answer all button. Use the down-arrow button instead if you only want to answer to the sender of the electronic mail (leaving out any recipient who is in copy).
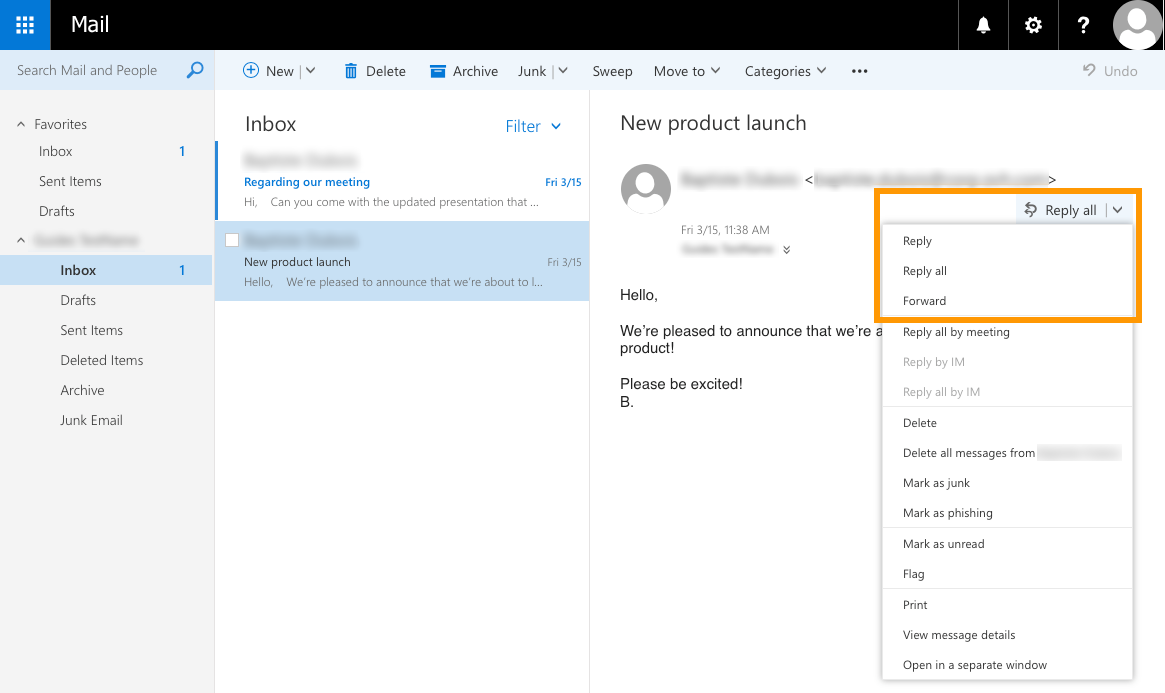
When you lot choose to respond, the quick-reply editor volition announced above the email. Compose your reply here, and once y'all are ready to send your mail, click Transport. Please note that for all reply options (like adding a signature), it must be extended to the full editing pane first by clicking on the double-pointer symbol.
Organising your inbox
OWA provides several means to organise your inbox. You can
- create folders and subfolders
- move emails
- set rules so that deportment are performed automatically when a new email is received
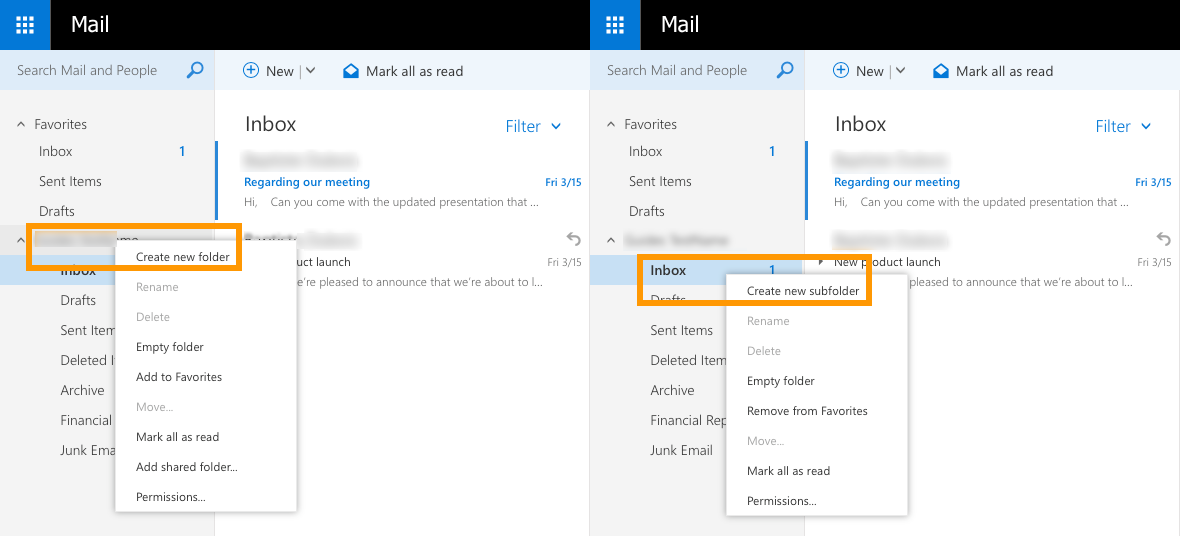
Creating a folder
To create a new folder, right-click on the name of your email address in the folder tree and so choose Create new folder. You can create a subfolder in existing folders in the same way (Create new subfolder).
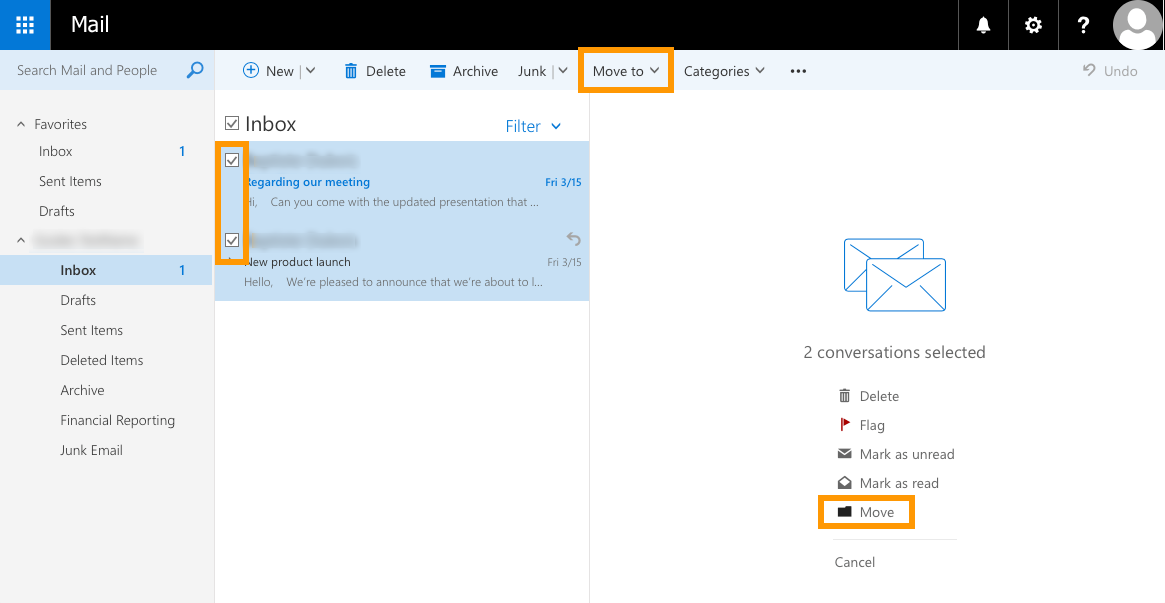
Moving emails
To move an email, you can simply drag-and-drib it to the target binder or right-click it and select Motion. To movement multiple emails at in one case, select them by checking their tick boxes, and click Move (on the right-hand side) or Move to (in the top section). Then choose the destination folder.
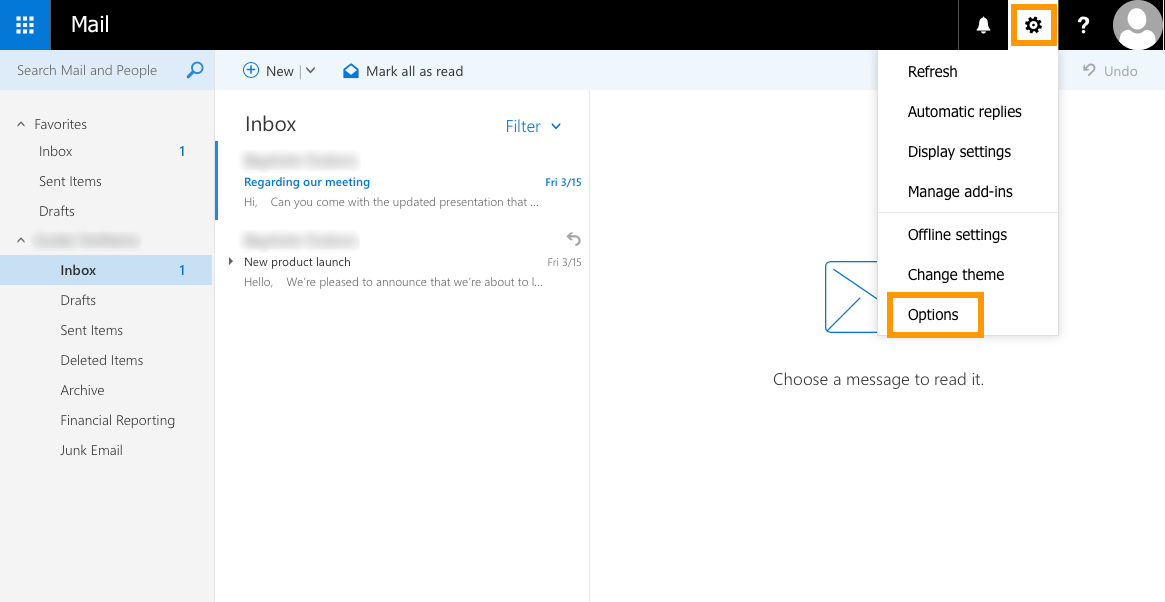
Creating inbox rules
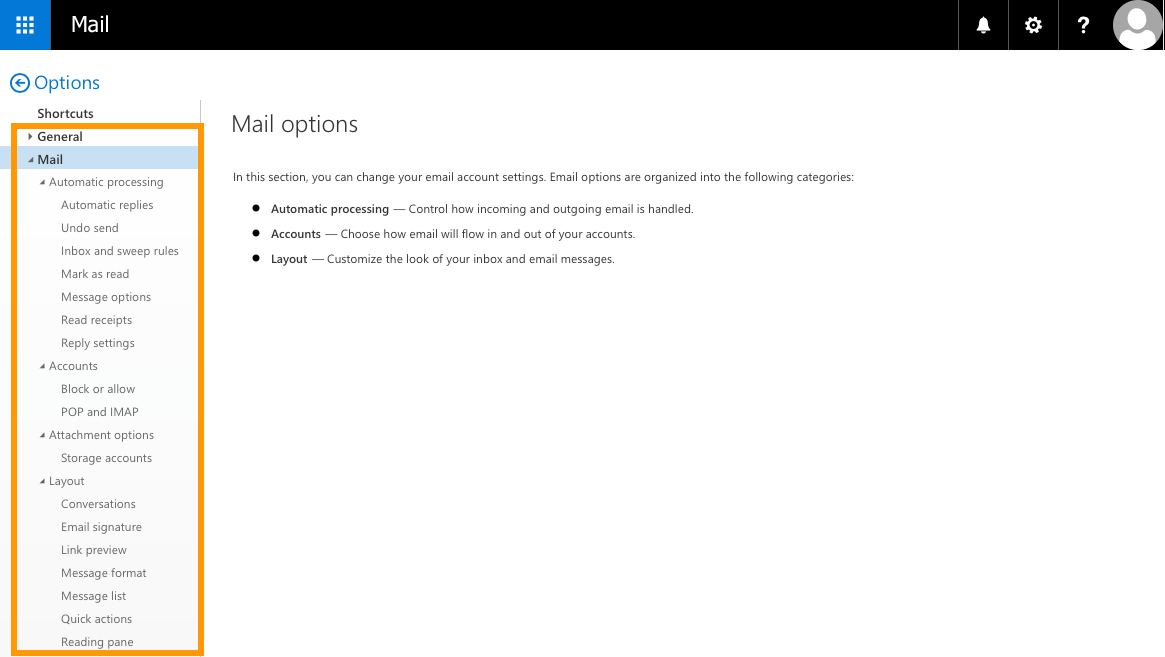
To manage rules, click on the gear icon at the top, so click on Options.
On the new page that appears, click on Inbox and sweep rules in the left-manus carte. In the "Options" tree-view, y'all can observe this particular under "Mail service", and so "Automated processing". From here, you lot can create, edit, delete and motility rules in the listing.
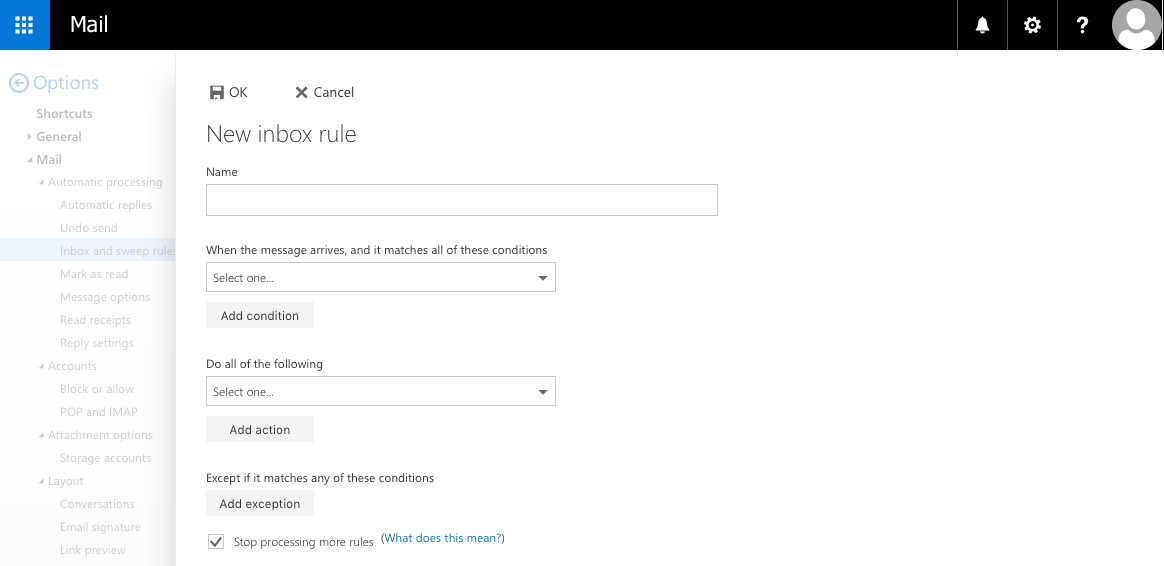
To add together a new rule, click the + button.
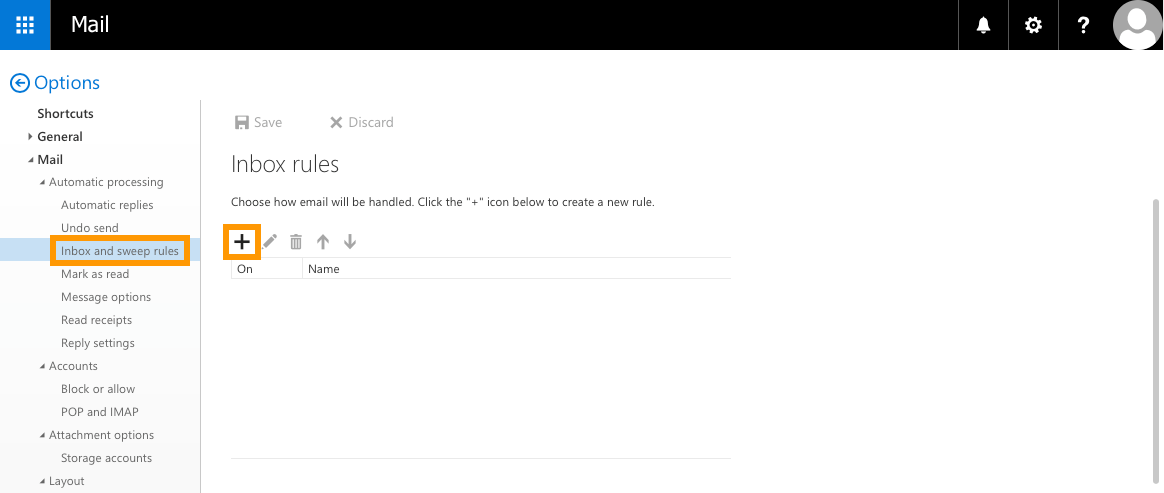
Fill in the requested information depending on the action you want the rule to carry out. Afterwards, click OK.
For more detailed instructions most creating inbox rules, delight refer to our guide: Creating inbox rules in OWA.
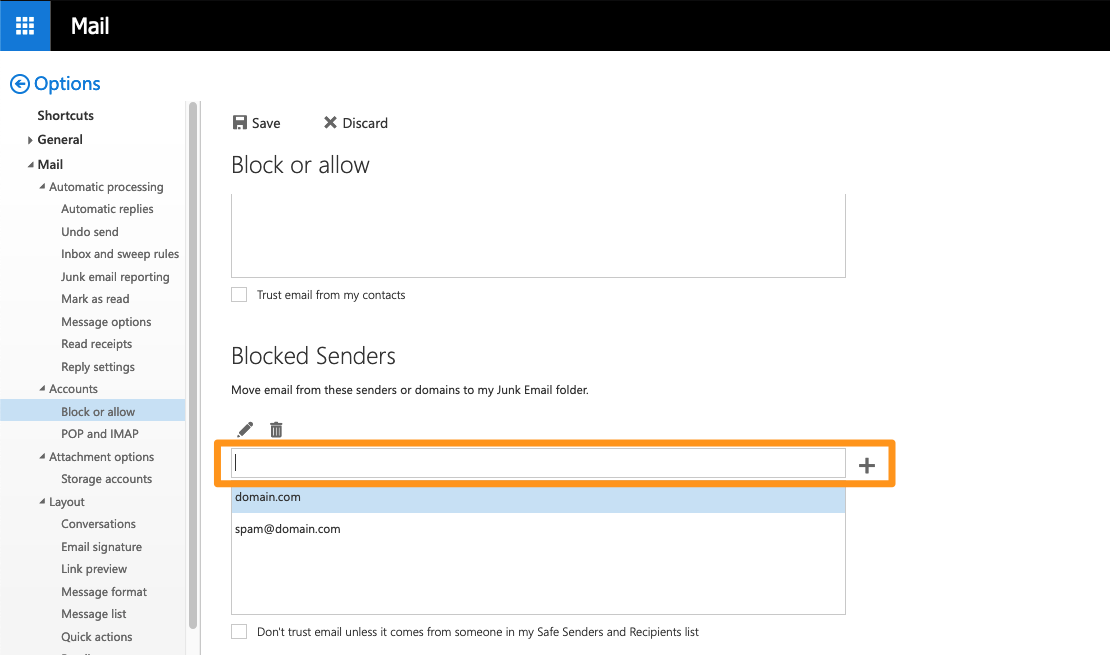
Block a sender
Click on the cog in the top right-hand corner, and then click on "Options". In the left-hand cavalcade, follow the "Mail" tree under "Accounts", then "Block or authorise".
In the "Blocked Senders" department, blazon an electronic mail address or domain name to block, and then click the + push button to add it to the list.
Managing a contact list
To manage your contacts, click the blue "app launcher" button at the pinnacle, then click on People.
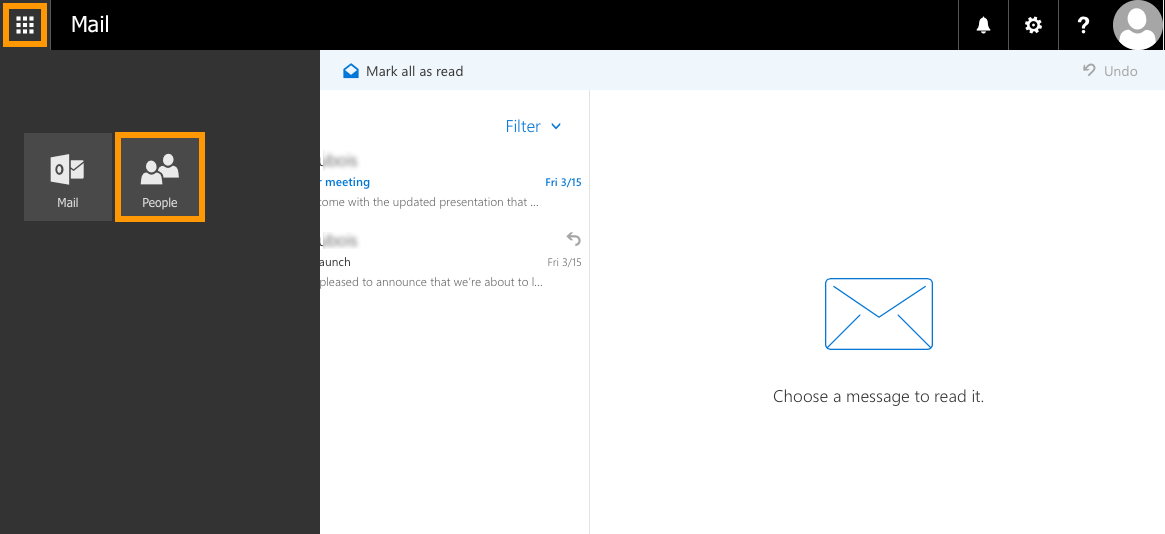
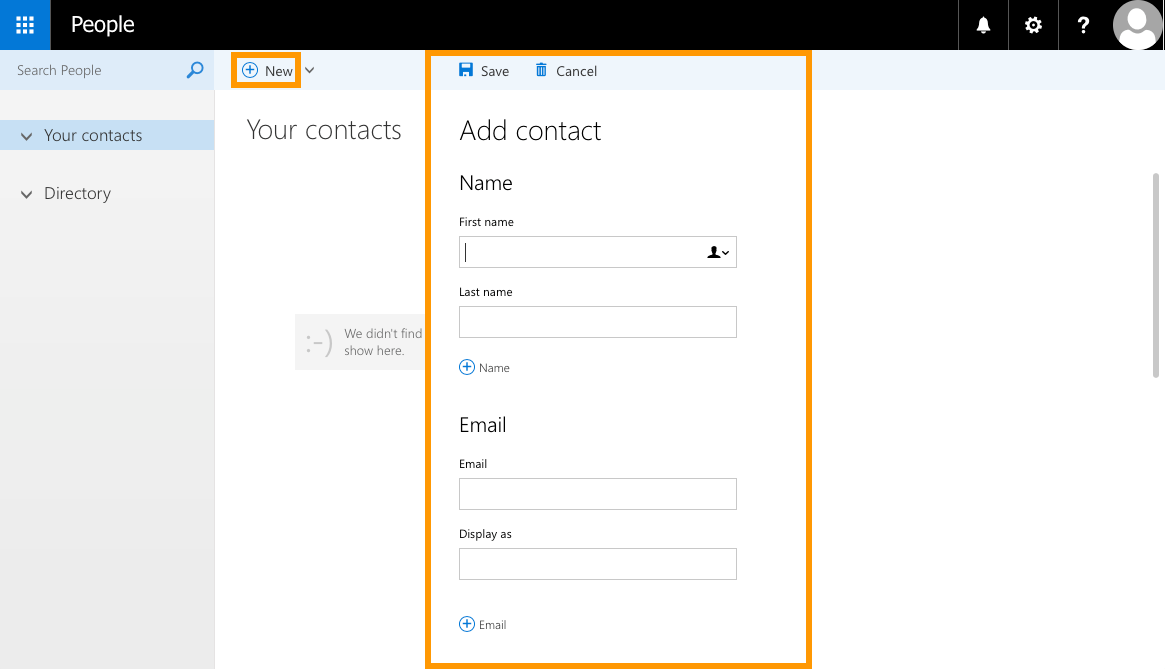
On the new page, you tin add together a new contact, create a contact list, and remove existing contacts.
To add a new contact, click New, and enter the contact details you want to add. In one case y'all accept done this, click Save.
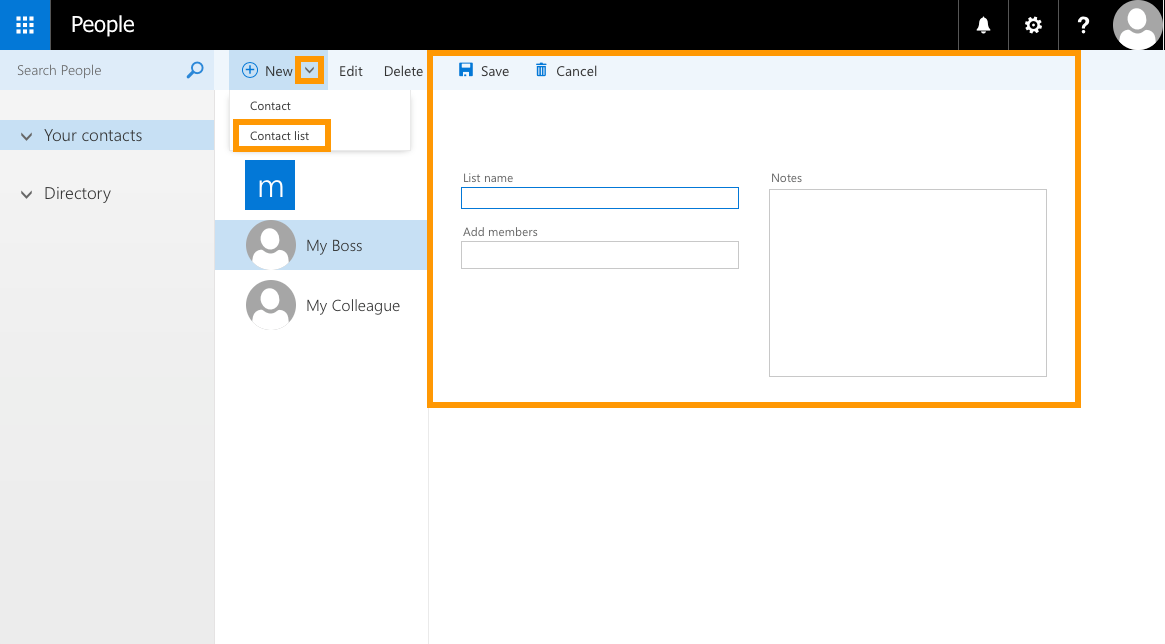
To create a contact list, click the down-arrow button next to "New", and so click Contact Listing. Requite information technology a name, add contacts to information technology, then click Save.
Changing the countersign
You can change your account password when you are logged in to OWA. To do this, click the gear icon at the top, and then click Options.
On the new folio, aggrandize the "Full general" tab in the tree on the left-manus side, then click My Account. Finally, click Change Countersign.

In the new window that pops up, enter your electric current password. And then enter a new password, and re-enter to ostend it. Click the Save button to relieve the new password.
Recall to also enter your new password on whatsoever device i.east. email client used to access this account. In case of any bug with your password, contact your service administrator.

Calculation an auto-reply
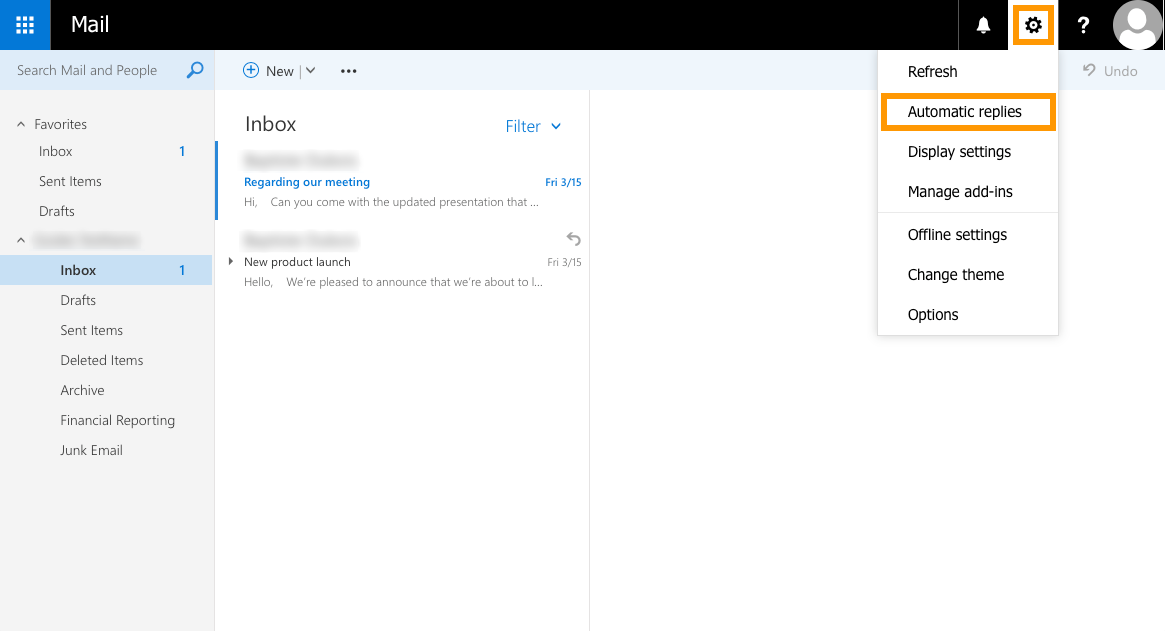
In OWA, you can create an automatic reply on your email address to non leave emails unanswered during absences. To do this, click the gear icon at the top, and so click Automatic Replies.
In the window that appears, select the option "Ship automatic replies". Yous can then prepare the auto-responder to fit several criteria:
- ship auto-reply emails for a fixed time interval, or continuously until it is manually disabled
- ascertain which senders volition receive auto-reply emails (internal senders just, or include external senders)
Now, make full in the requested information depending on the action you lot desire it to carry out. Once you have done so, click OK.

For more detailed instructions about creating motorcar-replies, please refer to our guide: Creating automatic replies in OWA.
Adding a signature
To add together an e-mail signature, click the gear icon at the top, then click Options.
On the left-hand side of the new page, click Email signature. In the options tree, this particular is under "Mail" and "Layout". From here you can enable, disable and edit the signature.
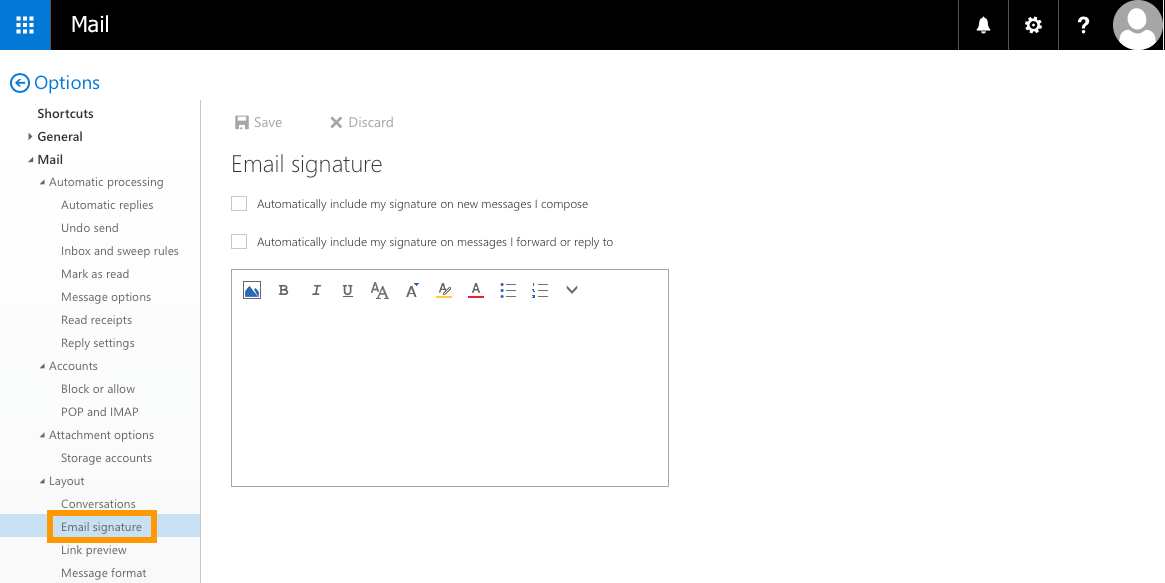
Etch your electronic signature in the editor box. You can specify whether you desire to include the signature by default in new emails only or in replies and forwarded emails likewise. Once yous have finished, click Save to confirm.
For instructions about creating automated signatures past using domain-wide templates, delight refer to our guide: Creating automated signatures.
Accessing the options section
To admission all your settings, click the gear icon at the top, then click Options.
Yous can then browse the "Options" tree-view on the left-hand side of the page. Further adjustments to the layout and behaviour of your email account can exist gear up from here. Delight annotation that some of the account options may be disabled from our side for security reasons.
Cookie management
The webmail that is used for our electronic mail offers is based on Microsoft Outlook Web Awarding software. Information technology is therefore likely to exchange metadata with Microsoft servers, in the form of cookies chosen appsforoffice.microsoft.com.
If y'all want to disable these exchanges, you tin can use a content blocking extension (such as uBlock Origin or Ghostery) on your browser. Yet, disabling these cookies may affect the stability of your webmail.
Go further
Creating automatic replies in OWA
Sharing folders in OWA
Sharing calendars in OWA
Creating contact groups
Join our community of users on https://community.ovh.com/en/.
Did you find this guide useful?
Delight feel free to requite any suggestions in club to meliorate this documentation.
Whether your feedback is virtually images, content, or structure, please share it, so that nosotros tin meliorate it together.
Your support requests will not exist processed via this class. To do this, please utilize the "Create a ticket" form.
Cheers. Your feedback has been received.
These guides might besides interest you...
Australia Outlook Login Page and Owa Login Page
DOWNLOAD HERE
Source: https://docs.ovh.com/ie/en/microsoft-collaborative-solutions/exchange_2016_outlook_web_app_user_guide/
Posted by: griffinhimag1960.blogspot.com